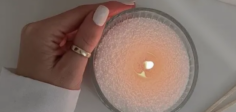
Gel wax candles are a stunning choice for candle lovers, thanks to their crystal-clear appearance and ability to showcase embedded decorations like shells, flowers, or glitter. Unlike traditional wax, gel wax is made from mineral oil and a polymer resin, giving it a jelly-like texture that burns slowly and beautifully. Here’s how you can make them at home.
Materials Needed:
- Gel wax (medium or high density for better fragrance hold)
- Candle-safe fragrance oil
- Liquid candle dye (optional)
- Heat-resistant glass containers
- Candle wicks with wick holders
- Decorative items (non-flammable)
- Double boiler or heat-safe pouring pot
- Thermometer
Step-by-Step Guide:
- Prepare the Container – Fix your wick in the center of the glass container using wick stickers or hot glue. Make sure it’s secure and straight.
- Melt the Gel Wax – Using a double boiler, heat the gel wax slowly to about 95–100°C (203–212°F). Do not overheat as it can create bubbles or yellowing.
- Add Color and Fragrance – Once the wax is melted and clear, add a drop of liquid dye for color if desired. Stir gently to avoid creating air bubbles. Add fragrance oil at around 93°C (200°F) (about 3–6% of wax weight).
- Decorate (Optional) – Place shells, stones, or other non-flammable items inside the container before pouring.
- Pour the Wax – Pour slowly into the container to avoid bubbles. For a layered effect, pour in stages, allowing each layer to set slightly before adding the next.
- Cool and Trim – Let the candle cool completely at room temperature. Trim the wick to about 0.5 cm (¼ inch).
Tips:
- Avoid adding water-based decorations, as they can cause splattering.
- If you see bubbles, reheat the wax slightly and stir gently.
Contact Us:
📧 [email protected]
📞 +86 17638410293