Gel wax is a unique and transparent wax often used for decorative candles. Making it at home allows you to customize your candles with embedded objects, colors, and scents. Here’s a step-by-step guide:
Step 1: Gather Your Materials
- Gel wax (available from craft or candle supply stores)
- Candle fragrance oil (compatible with gel wax)
- Candle dye or liquid colorant
- Heat-resistant glass containers
- Wick (zinc-core wicks work best for gel candles)
- Double boiler or heat-safe melting pot
- Thermometer
Step 2: Melt the Gel Wax
- Cut the gel wax into small pieces.
- Place it into a double boiler and heat slowly.
- Stir gently and avoid whipping air into the wax (this prevents bubbles).
- Heat to about 200°F (93°C) — do not overheat, as gel wax can burn.
Step 3: Add Color and Fragrance
- Once the wax is melted and clear, add liquid candle dye drop by drop until you reach the desired color.
- Add fragrance oil (typically ½ oz per pound of wax). Stir slowly and evenly.
Step 4: Prepare the Container and Wick
- Secure the wick in the center of your glass container using wick stickers or glue.
- Keep the wick upright by using a wick holder or pencil laid across the top of the container.
Step 5: Pour the Wax
- Slowly pour the melted gel wax into the container.
- If you’d like, add decorative elements such as seashells, glass beads, or glitter (ensure they are non-flammable and safe for candles).
- Leave about ½ inch at the top of the container.
Step 6: Let It Set
- Allow the candle to cool at room temperature.
- Trim the wick to about ¼ inch before lighting.
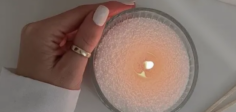
✅ Now you have a homemade gel wax candle that looks beautiful and burns cleanly.
📩 For wholesale candle wax & supplies, contact us at:
[email protected]