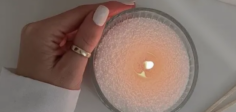
Beeswax candles have been treasured for centuries for their natural honey scent, warm golden glow, and clean burn. Whether you’re a beginner or an experienced candle maker, working with beeswax is both rewarding and straightforward. Here’s a practical, step-by-step guide to making your own beeswax candles at home.
Materials You’ll Need
- Pure beeswax (blocks, pellets, or sheets)
- Candle wicks (choose cotton or hemp, size according to candle diameter)
- A double boiler (or heat-safe bowl over a pot of simmering water)
- A thermometer
- Containers or molds (glass jars, tins, or silicone molds)
- Wick centering tools (chopsticks, pencils, or wick holders)
Step-by-Step Instructions
1. Prepare Your Wick
Measure and cut the wick so it’s about 2–3 cm taller than your container or mold. Secure the wick in place with a centering device, ensuring it’s upright and straight.
2. Melt the Beeswax
Place your beeswax in the double boiler and heat gently until fully melted. Beeswax melts at around 62–64°C (144–147°F). Avoid overheating to prevent discoloration or burning.
3. (Optional) Add Essential Oils
If you’d like a custom scent, remove the wax from heat and let it cool to about 65°C (150°F) before stirring in essential oils. Beeswax already has a natural honey aroma, so choose complementary scents like lavender, orange, or cinnamon.
4. Pour the Wax
Slowly pour the melted beeswax into your container or mold, holding the wick in place. Pouring too quickly may cause air bubbles.
5. Cool and Trim the Wick
Allow the candles to cool completely at room temperature. Once solid, trim the wick to about 0.5 cm (1/4 inch) before lighting.
Pro Tips
- Pre-warm glass containers to avoid cracking when adding hot wax.
- For pillar candles, use molds designed to withstand heat and make unmolding easier.
- Beeswax burns slower than other waxes, so use thicker wicks for larger candles.
Need bulk beeswax or candle-making advice? Contact us:
📧 [email protected]
📞 +86 17638410293
 English